✅ Quick answer — the 3 settings to check first:
- Device admin apps — Settings › Security & privacy › Device admin apps.
- Accessibility › Installed/Downloaded services — the most abused permission on Android.
- Privacy dashboard — a 24-hour log of every camera, mic and location access.
Spy apps hide from the app drawer, but they cannot hide from Android itself. To do anything useful — read your messages, resist uninstalling, watch your screen — a monitoring app must register itself in one of a handful of system lists. Those lists live in settings screens most people never open, which is precisely what stalkerware counts on. Open them, and the hiding stops working.
This guide tours the seven settings screens that matter, in the order that catches the most spyware soonest. For each one you’ll learn exactly where it is, what a normal phone looks like there, and what a red flag looks like. Twenty minutes with these seven screens tells you more than any scanner app, because you are reading the same registries Android itself uses to grant apps their power. Paths below follow stock Android 14/15; Samsung, Xiaomi, and other brands rename menus slightly, and we note the common differences as we go.
Setting 1: “Show system” in the full app list
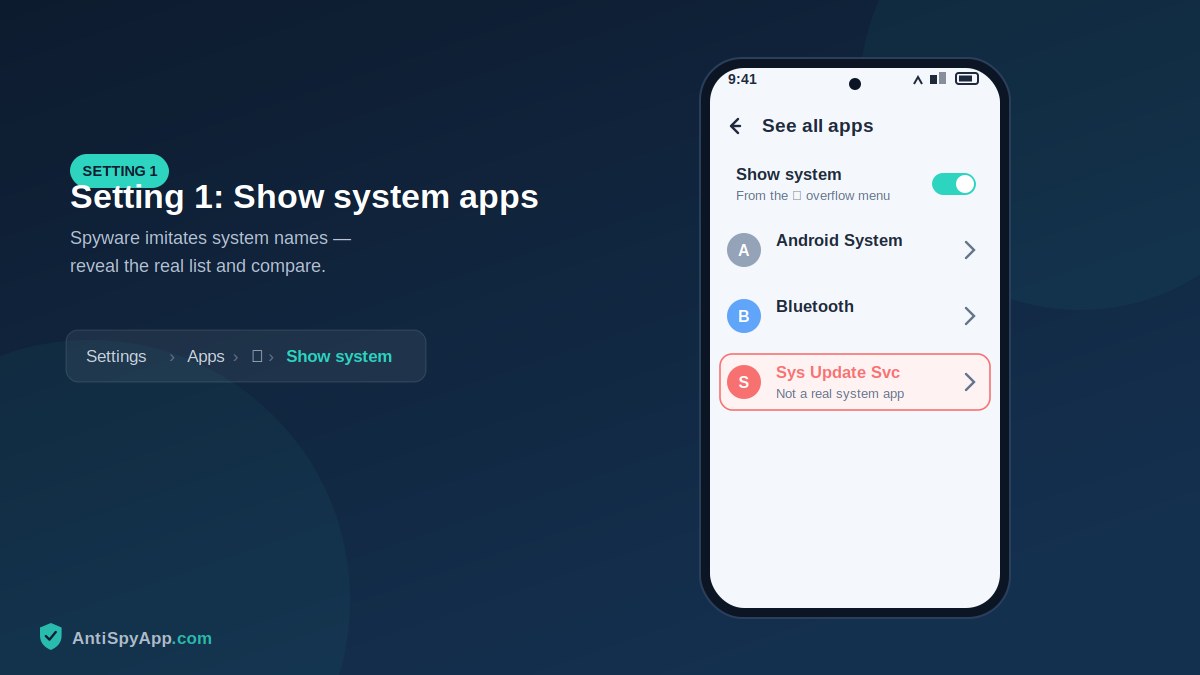
Start with the complete inventory. Go to Settings > Apps > See all apps, then tap the three-dot menu and choose Show system. The list now includes every process on the phone — and, more importantly, it exposes the favorite trick of spyware: disguising itself as a system component. Real system apps come from Google or your phone’s manufacturer; stalkerware pretends with names like “System Service”, “Android Update Service”, or “WiFi Sync”. Three checks separate real from fake. Tap the suspicious entry and look for App details in store — a link to Google Play is a good sign; its absence on a non-Google app is a yellow flag. Check the install date under Storage if shown. And search the exact name from a different device: genuine components document themselves, stalkerware forum posts warn about themselves. Write down anything unresolved; the next six screens will likely mention it again.
Setting 2: Device admin apps
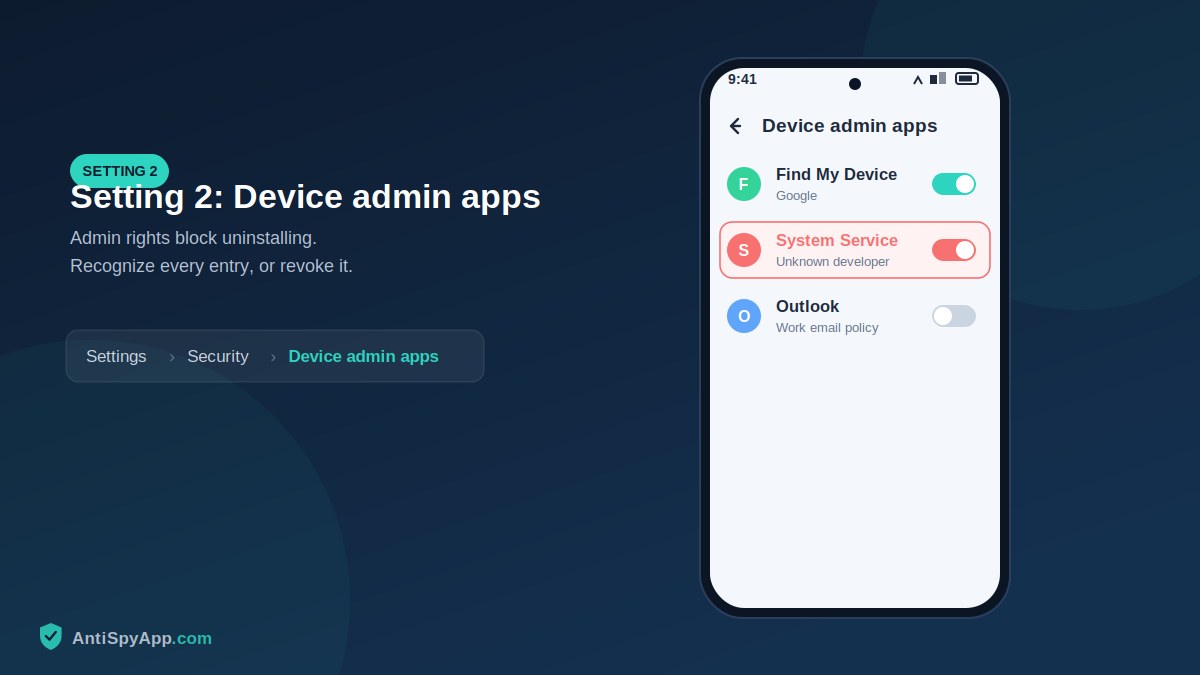
Device administrator is Android’s heavy-machinery permission: apps holding it can lock the screen, set password rules, and — the part spyware cares about — resist uninstallation. Find the list under Settings > Security & privacy > More security settings > Device admin apps (Samsung: Settings > Security and privacy > Other security settings > Device admin apps). A normal personal phone has one or two entries: Find My Device, perhaps a work profile agent if your employer manages the phone. Anything else must justify itself. Stalkerware almost always requests device admin during installation, because without it a victim can remove the app in ten seconds. If you find an unexplained entry, resist the urge to toggle it off immediately — first finish the tour and photograph each discovery with another device. Removal is a sequence, covered at the end, and doing it out of order can tip off whoever is watching.
Setting 3: Accessibility — installed services
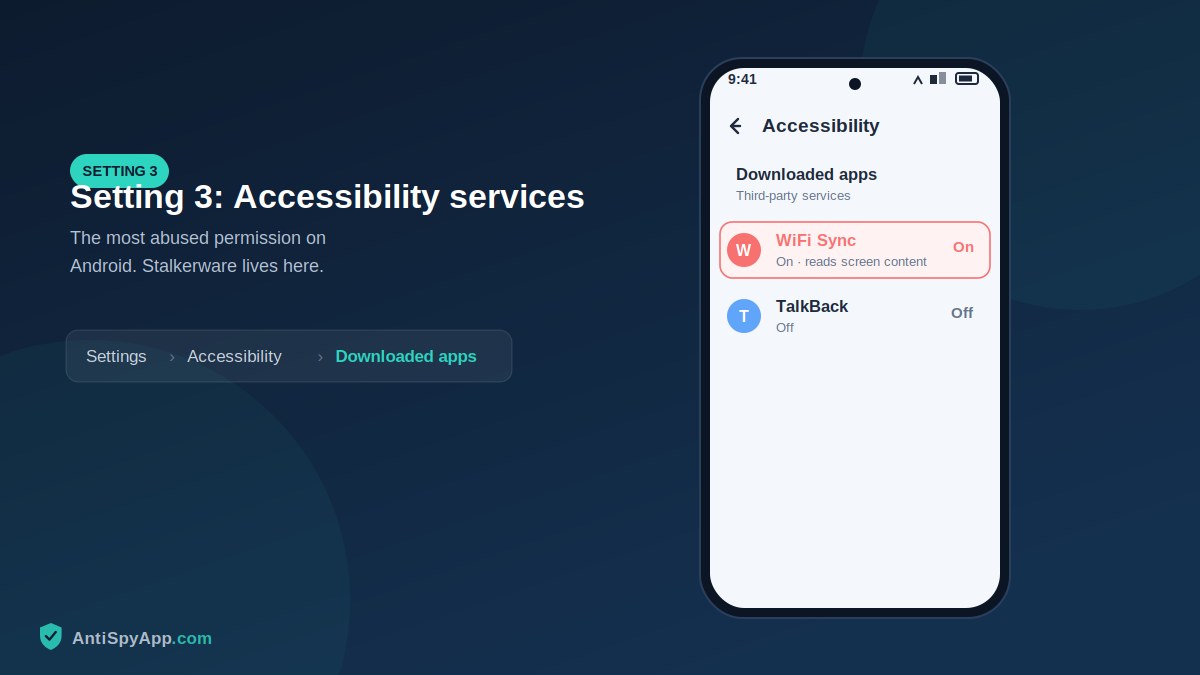
If you check only one screen from this article, make it this one. Accessibility services can read everything displayed on your screen and perform taps on your behalf — powers designed for screen readers, and abused by essentially every modern stalkerware product, because reading the screen defeats even encrypted messengers. The moment your message appears on screen, an accessibility-armed app can copy it. Open Settings > Accessibility and scroll past the built-in features to Downloaded apps (some brands: Installed services). This list should be short and self-explanatory: a screen reader you use, a password manager’s autofill, perhaps a battery utility you chose. Every entry you cannot personally explain is a serious finding. Tap it to see whether it is switched on, note the name, and cross-reference with what you found in settings 1 and 2 — stalkerware typically appears in at least two of these registries at once.
Setting 4: Special app access — usage access
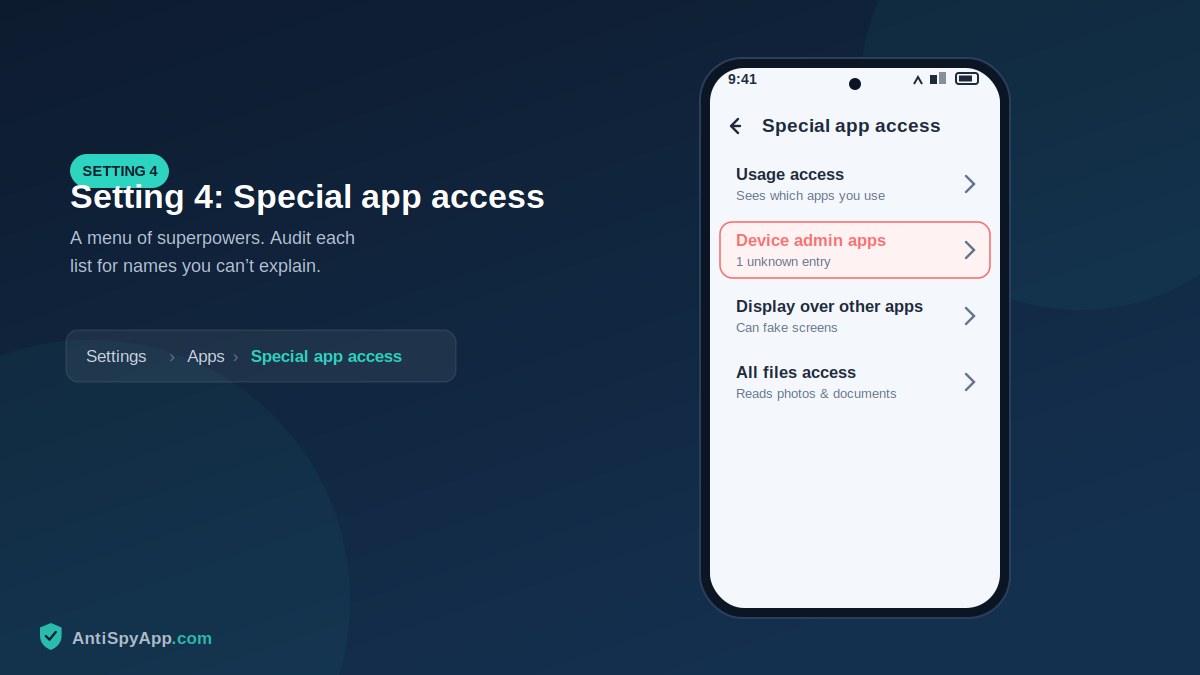
Settings > Apps > Special app access is a drawer of narrow, powerful permissions, and Usage access is the one monitoring software loves: it reveals which apps you open, when, and for how long — a complete timeline of your digital day. Open the list and audit it. Legitimate holders are things like digital wellbeing tools and some launchers; a “sync service” with usage access has no innocent story. While you are in Special app access, also open Display over other apps (apps that can draw over your screen, abused for capturing input) and Do Not Disturb access. The pattern to internalize: each of these lists is short by design, so on a healthy phone you can account for every single row. The moment a row has no story, you have a lead.
Setting 5: Notification access
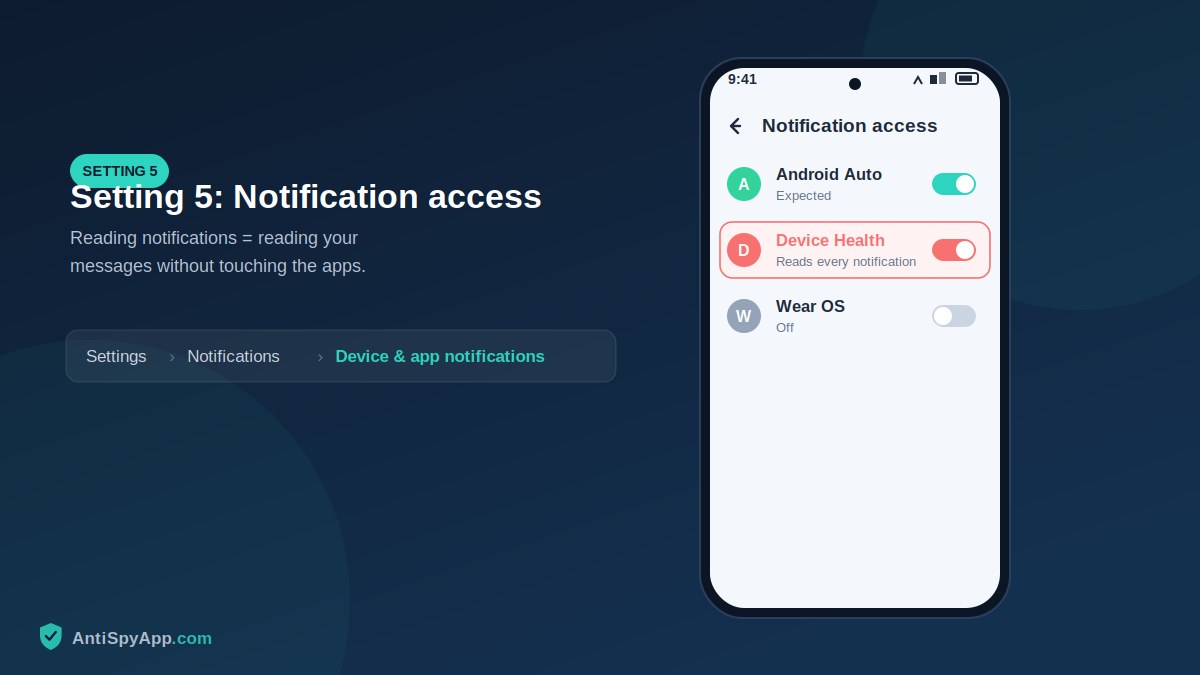
An app with notification access reads every notification your phone shows — message previews, security codes, email subjects — without needing any other permission. That makes it a favorite shortcut: why break encryption when the preview lands in your notification shade? Find the list at Settings > Notifications > Device & app notifications (or via Special app access > Notification access). Expect to see your smartwatch companion, Android Auto, maybe a notification manager you installed. Question everything else, and be especially suspicious of generic names paired with this permission. Two-factor authentication codes arriving by SMS appear in notifications, which means an app sitting in this list can defeat your 2FA — reason enough to keep the list ruthlessly short even on a phone with nothing wrong.
Setting 6: Install unknown apps
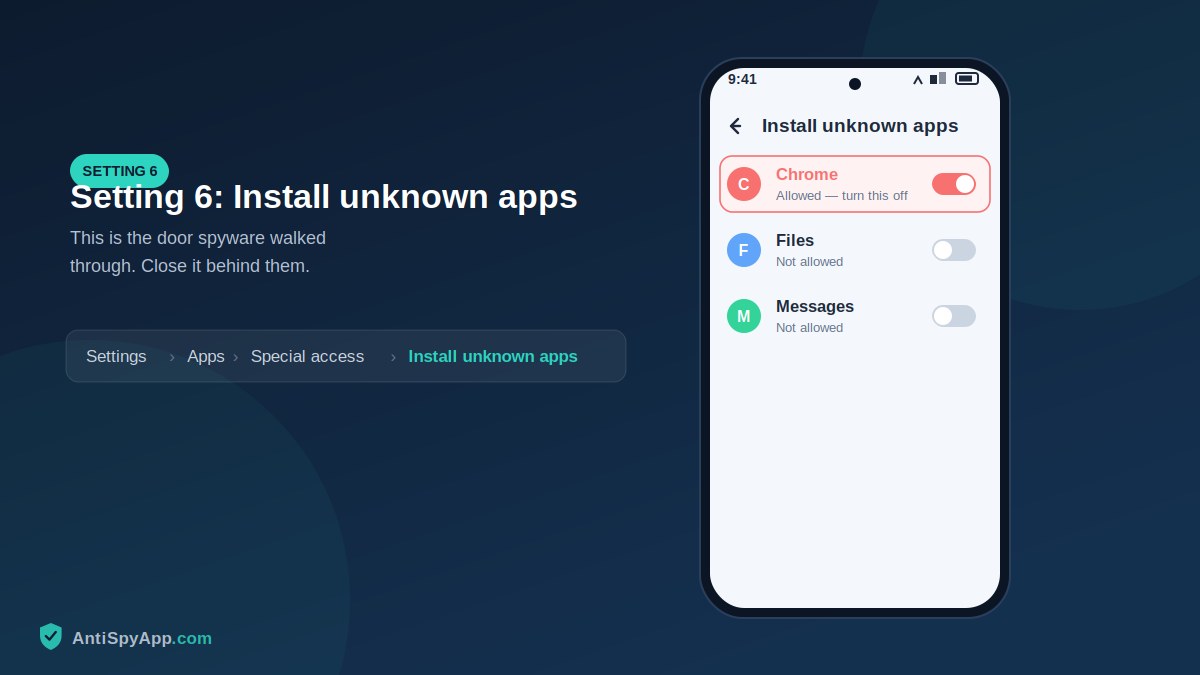
This screen answers a different question: not “what is spying?” but “how did it get in?” Stalkerware is banned from Google Play, so it arrives by sideloading — downloaded in a browser or copied over and installed directly. Android only allows that if a specific app (the browser, a file manager) has been granted Install unknown apps. Open Settings > Apps > Special app access > Install unknown apps and see which sources are set to Allowed. On most people’s phones the honest answer is: none. Chrome or a file manager set to Allowed — when you never sideload anything yourself — is the fingerprint of someone else’s installation session. Set every source to not allowed. This costs you nothing day-to-day (Android asks again if you ever genuinely need it) and removes the most common installation path in one move.
Setting 7: The Privacy dashboard
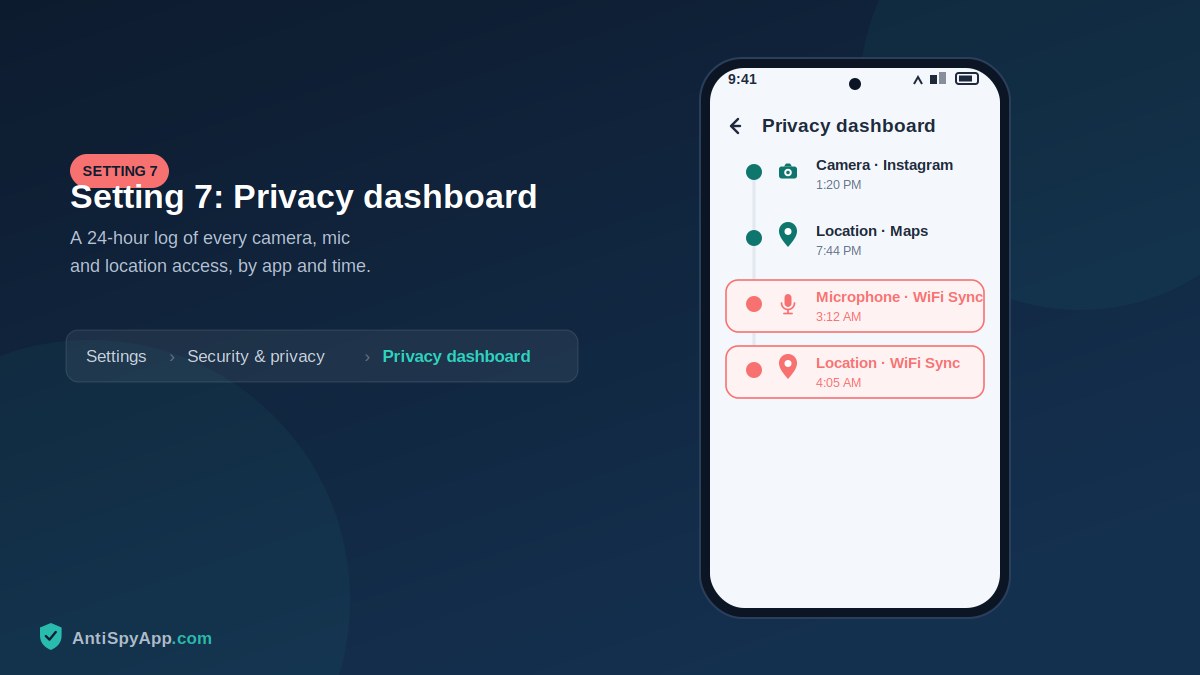
The first six screens show who could spy; this one shows who did. The Privacy dashboard (Settings > Security & privacy > Privacy > Privacy dashboard, on Android 12 and later) charts every camera, microphone, and location access over the past 24 hours, by app, with timestamps. Read it against your own day. You know when you took photos and asked for directions; the dashboard knows the rest. Microphone access at 2:41 a.m. is not a debate — it is a named app caught in the act. Tap any event to jump to that app’s permission page and revoke on the spot. Make this dashboard a habit: it is the single fastest recurring check on Android, and it turns the vague fear of “being watched” into a concrete, auditable log.
Found Something? Remove It in the Right Order
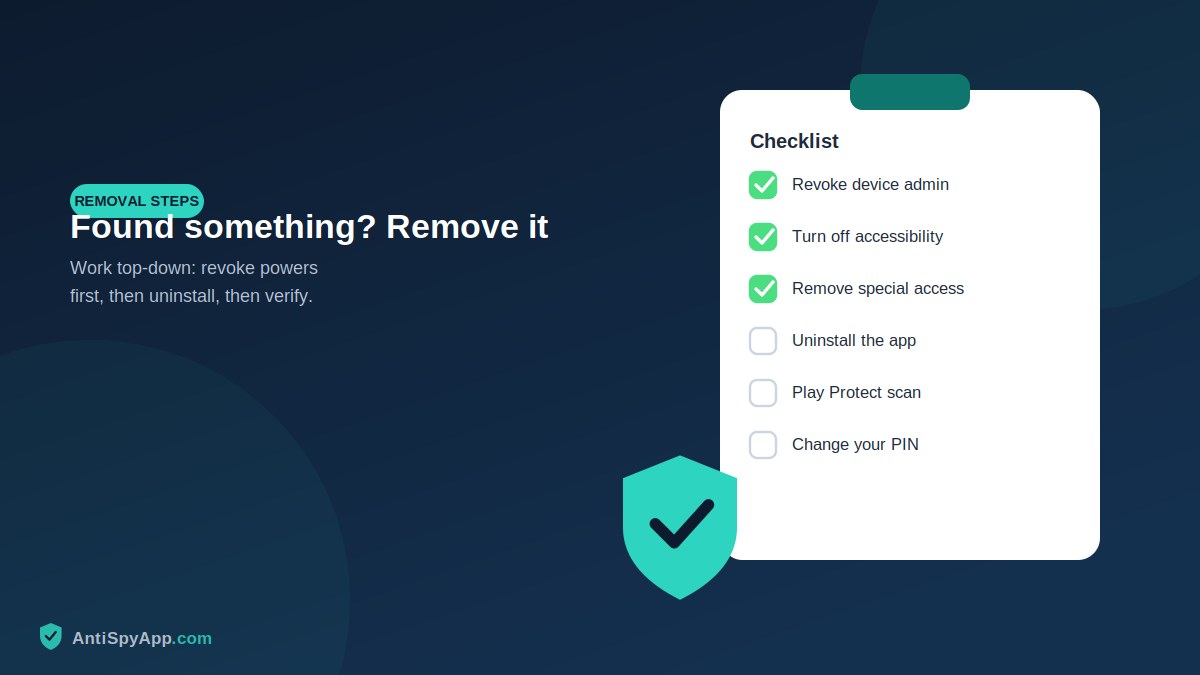
Removal order matters because device admin blocks uninstalls. First, if the likely installer is a partner or family member and there is any risk in them finding out, pause — read the safety section of our stalkerware guide and consider making a plan before changing anything. When you are ready: photograph every screen where the app appears (evidence disappears with the uninstall); revoke its device admin entry; disable its accessibility service; then uninstall from Settings > Apps, using Safe Mode if the app fights back. Finish by running a Google Play Protect scan, setting every “Install unknown apps” source to not allowed, changing your Google password from a clean device, and setting a new screen-lock PIN nobody else knows. Our 13-step removal guide walks each of these with pictures if you want the detailed version.
Reading the Pattern: What a Clean Phone Looks Like
After the tour, step back and read the whole picture, because the seven screens are more powerful together than separately. A clean phone has a boring pattern: every app in the full list has a story, device admin holds one or two famous names, accessibility and notification access are nearly empty, usage access contains only wellbeing tools, no source may install unknown apps, and the Privacy dashboard matches your memory of the day. An infected phone breaks the pattern in a correlated way — the same unfamiliar name tends to appear in two or three registries at once, its install date lines up with when your battery got worse, and the dashboard shows it touching sensors at odd hours. One anomaly is a question; the same name answering several questions is a conclusion. This is also why doing the full tour once matters even on a healthy phone: you are photographing your baseline, and every future check becomes a simple game of spot-the-difference.
The Seven-Screen Recap
Show system exposes the full inventory; device admin reveals apps that resist removal; accessibility services show who can read your screen; usage access shows who tracks your app habits; notification access shows who reads your previews and 2FA codes; install unknown apps shows how anything got in; and the Privacy dashboard shows what actually fired. Search each name in your settings app if your brand hides the path. Twenty minutes for the first full tour, five for every repeat — and nothing on this list requires installing a single app.
Frequently Asked Questions
Why doesn’t antivirus catch what these settings screens catch?
Scanners match apps against lists of known bad software, and stalkerware vendors rebrand and repackage constantly to stay off those lists. The seven registries in this article don’t care what an app is called or how new it is — to function at all, spyware must appear in them. That is why a manual tour finds rebranded stalkerware that a scanner passes, and why Google’s own advice for stalkerware includes checking device admin and accessibility by hand. Use Play Protect as a first pass, and these screens as the real audit.
Some entries on my phone look different from the paths in this article. Am I checking the wrong thing?
Probably not — manufacturers rename relentlessly. Samsung buries device admin under “Other security settings”; Xiaomi’s MIUI scatters special access across two menus. The reliable trick is the settings search bar: type “device admin”, “accessibility”, “usage access”, “notification access”, or “install unknown” and jump straight to each screen regardless of brand. The list names what matters, not the path to reach it.
How often should I repeat this tour?
Do the full seven screens now and after any event that worries you — the phone left unattended and unlocked, a relationship ending badly, a repair shop visit. For maintenance, the Privacy dashboard weekly and settings 2 and 3 monthly cover the highest-value ground in under five minutes. The point of the first full tour is to learn your phone’s normal; every later check is just spotting differences.
This article is for general information. Menu names vary by manufacturer and Android version; all main paths reflect stock Android 14/15.